During the pandemic, the world was low. We all suffered losses in so many parts of our life. It’s time for a new light, a new hope!
This lightsaber was forged from those dark times, turning a cheap toy into your own fully interactive lightsaber, championing sustainability and durability.
All you need are some electronics basics, and lots of finagling! This build does not require a 3D printer, and you carve out the space you need.
If you’re looking for just the prop summary and not the full tutorial, I have it in my portfolio here. This also won the Make Media & Nvidia’s May the 4th Maker Contest under the Cosplay and Prop category, and if you’re curious, here’s my Winning Submission.
Motivation: Why you should reuse that old toy
It’s time to take a second look at that toy!
This build is sustainable-minded, reusing the awesome features this toy has already. If you do not already have this toy, you can fetch these in Ross or Amazon for low prices, and it gives the toy new life instead of ending up in a landfill. I reuse as much of the toy as possible, incorporating its built in speakers and excellent button, and enhancing it with awesome upgrades.
Because it’s a toy, the hilt is meant to take a beating! Once you do your upgrades, it’s battle-ready for when Kylo Ren or Papa Papaltine shows up. Your build builds on top of the great toy design put into these things, as it is expected that kids will be swinging these things hard!
Finally, this build requires mostly low tech materials, with the fanciest equipment being a Dremel/rotary tool and a soldering iron. When building during the pandemic, I did not have access to 3D printers, and I love to explore how anyone, especially those with lesser technological access, can build.
What to expect
Let me guide you on how to build your first version of the prototype. I hope to drop in lots protips and multiple ways to accomplish this, along with some fun upgrades.
More importantly than a lightsaber, I hope to empower you to become curious and iterate constantly, encouraging a spirit of design, prototyping, and iteration. I include a ton of checks, fail points, and encouragement that if something goes wrong, explore what else can be done.
Materials and Tools
Hardware
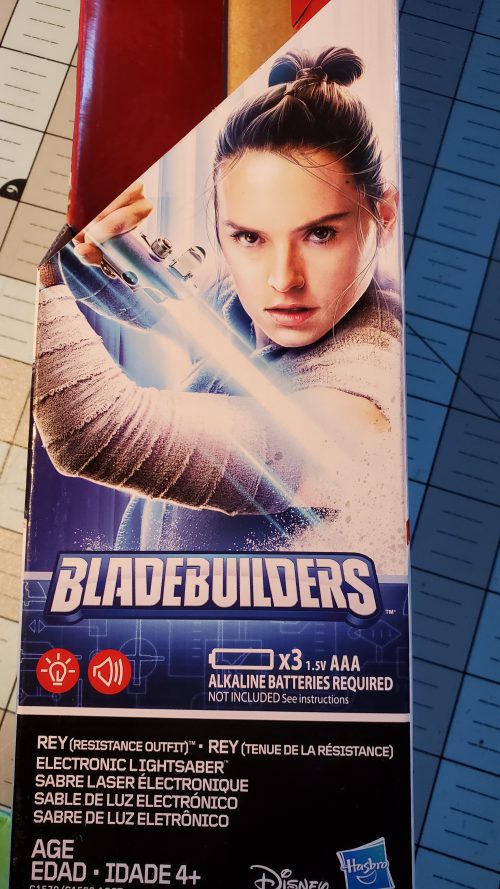
- Star Wars: The Last Jedi Rey (Jedi Training) Electronic Lightsaber
- Polycarbonate Tubing, 3/4″ ID x 1″ OD x 1/8″ Wall, Clear Color 36″ L for the blade
- Butcher paper, but any white paper (or even white plastic bags)
- 2mm craft foam
- Some cardboard as a pad for all of the dremeling and plastic bits, for easy cleanup!
- Sandpaper
- Clear PVC 1/4″ tubing. This tube will form a base for the LED strips to attach to.
- 16 gauge wire. This will act as the understructure for the blade.
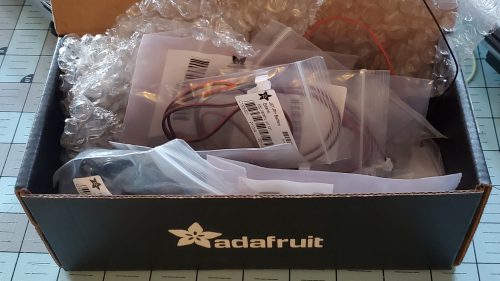
Electronics
I have used most of the electronics parts from Adafruit’s Lightsaber build, with a few exceptions:
- No need for a speaker; it comes with it. The speaker in their guide is rather nice though, so I do encourage you to give it a try.
- No extra buttons, though feel free to order a few if you’d like to upgrade! We’ll reuse the one provided in the toy.
- The switch is encouraged but not required. the power bank I suggest already has a power button. Though, I do encourage you to have a switch yourself! (and I’ll probably add one in!)
- This power bank. This build is a battle between finding the biggest capacity battery that fits into the small spaces of a hilt. This one seems to both fit and power the lightsaber!
- This JST kit. I had this one around, and it seems to work fine! The one they suggest is a-ok too!
- Twisty ties. Nothing fancy, just something helpful for cable management!
- I used this COB 332 leds/meter LED strip for my build, but for novices, I actually recommend this inexpensive one to start. The one I used is super dense, and I have specific prop goals for that. But, mine is expensive, and you may not need all of those LEDs! Try some cheap ones so you can play with it.
- A MicroUSB to USB cable. This is the one I used, but if you have a few that are lying around without use, it’s worth repurposing!
Tools
- Dremel or rotary tool, with a sanding drum, a ceramic wheel, and other smaller bits.
- Vices, grips
- Solder heat shrink on joints and soldering iron
- Wire stripper
- Respirator, safety goggles. Safety is the upmost concern.
- A silver marker
Wiring the brains of the lightsaber
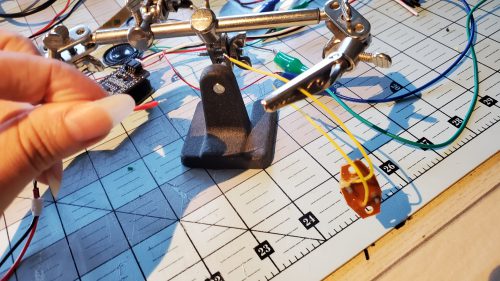
For this step, I predominantly used the excellent tutorial from Adafruit for both wiring and code. I think their process is super easy to use and novice-friendly!
As a friendly reminder, please do solder with proper safety equipment and ventilation.
Here are the only deviations when it came to soldering and electronics assembly:
- I suggest first trying to wire the button with the button in the toy, since it’s at such a great place!
- I also suggest using the toy’s speaker as well! The one they suggest is still excellent!
- It is not required but recommended to get a switch in there to cut off power.
Tweaks in code
Adafruit already provides code for you to play with! I’ll show you what I tweaked from the code section below. I do encourage you to further tweak and explore! I copied and pasted snippets of Adafruit’s code that you can find, and tweak to your liking:
NUM_PIXELS = 114
- adjust to how many LEDS you have
# CUSTOMIZE YOUR COLOR HERE:
# (red, green, blue) -- each 0 (off) to 255 (brightest)
# COLOR = (255, 0, 0)  # red
COLOR = (100, 0, 255)  # purple
- Change the blade color
COLOR_HIT = (255, 255, 255) # "hit" color is white
- Adjust the hitting color to make it less powerful. I’m using a large amount of LEDs, and depending on what you got, you may find that when you hit the lightsaber, the colors may be a red. To keep it brief, there is likely a voltage drop. One easy solution for this is making the white less bright, such as 96, 96, 96. Don’t worry, the change in color is still such a stark difference that you can still notice it.
(Re)Forging your own hilt
Now it’s time to get our hands dirty! The main goal of this step is to disassemble the toy, explore, see how it works, and carve it to fit our electronics.
Since we are carving and cutting out electronics with a dremel, please wear safety goggles and a respirator during these entire steps. This stuff is hazardous to your health. Please try to make a spot outside to do this work as well!
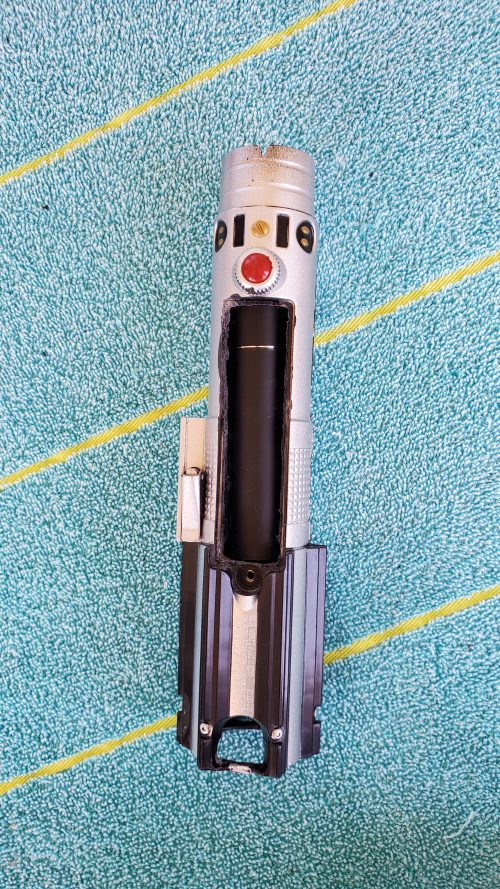
Take apart the lightsaber!
- First start by twisting the top part of the lightsaber, a ring at the top. It’s stuck with some light glue, and with some pressure, it should pop off.
- Next, start using pliers, vices to gently see-saw the lightsaber apart, starting from the top. Slow and steady is better here; the more you chip and dent the lightsaber, the worse it’ll look.
- To show you all a mistake I made, initially, in this step, I sawed out the bottom part of the hilt so I can better pry it open. It did work, but after taking the whole thing apart, I realized it would have been easier to start from the top of the blade and pry open! Please do give yourself room to make mistakes and get messy!
- Be sure to keep a baggie for any internal parts that come out. You’ll need them!
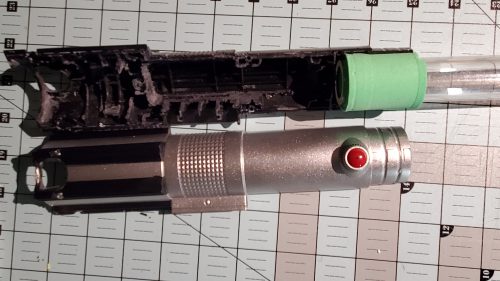
Let’s carve!
- Unscrew the battery case. We’ll start to work there.
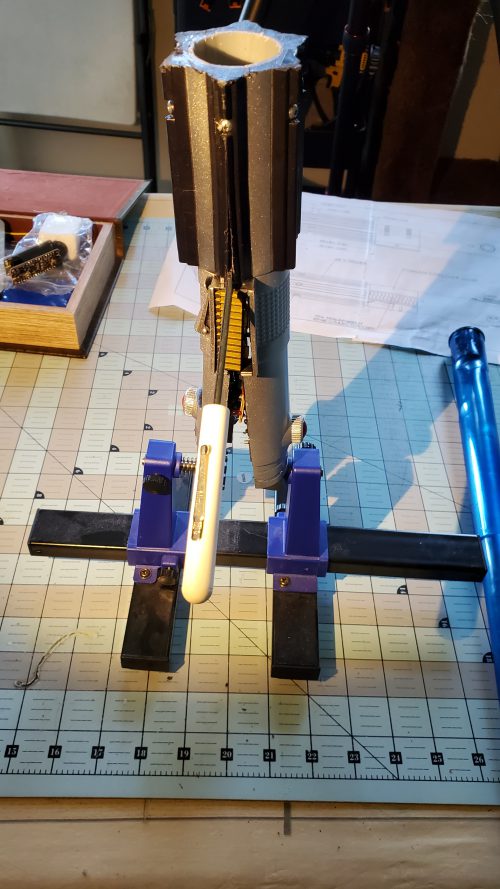
- Remove the battery casing entirely, until your battery fits comfortably inside. This requires a ton of iterating. I’d use the silver marker to mark where I’d like to try and cut, making sure that I’m not cutting away any joints or connecting parts. Then I’d cut out the area and see if the battery fits with the hilt closed. Rinse and repeat! It gets meditative over time!
- Carve out space for the microcontroller and prop-maker, along with the speaker. It’ll be the same procedure as the prior step.
- You’re close to the end of the carving process, and it’s a great time to tidy as you go! Sand and smooth out any bits that might have gotten damaged earlier.
Making the Blade
Here’s where we start to combine electronics with physical materials! We’ll first attach our blade to the hilt and feel awesome. After that, we’ll use the LED strip that we wired in the electronics Adafruit tutorial, and incorporate it into our blade.
Fitting the blade to the hilt
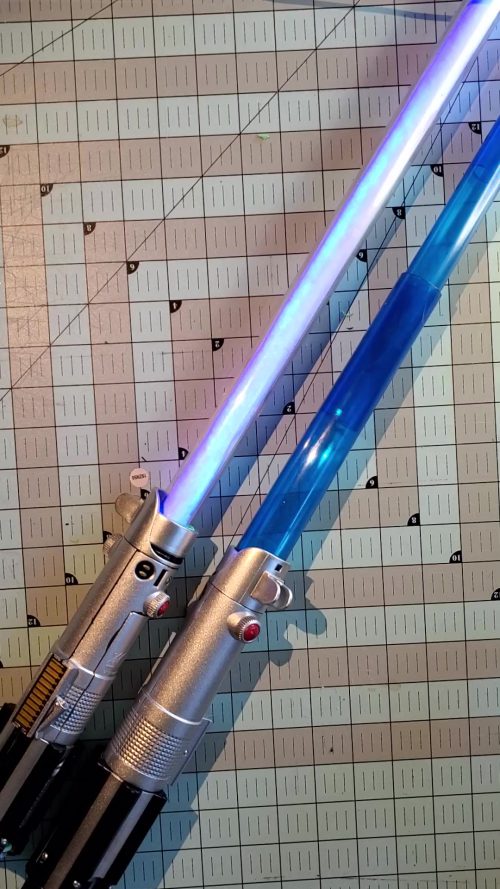
Let’s test fit our blade!
- First, notice that our blade is too small for our hilt. Stick your blade inside of the available space in the lightsaber, and notices that while we have a good amount of space, we’ll need to add a long rectangle of craft foam to pad and secure it.
- Cut out a long rectangle of craft foam, which is as wide as the opening for the blade, and ~10″ long. Wrap the blade’s base with the rectangle and see if it fits. If it fits snuggly when you assemble the hilt together, you got it!
Time to shed some light on the situation!
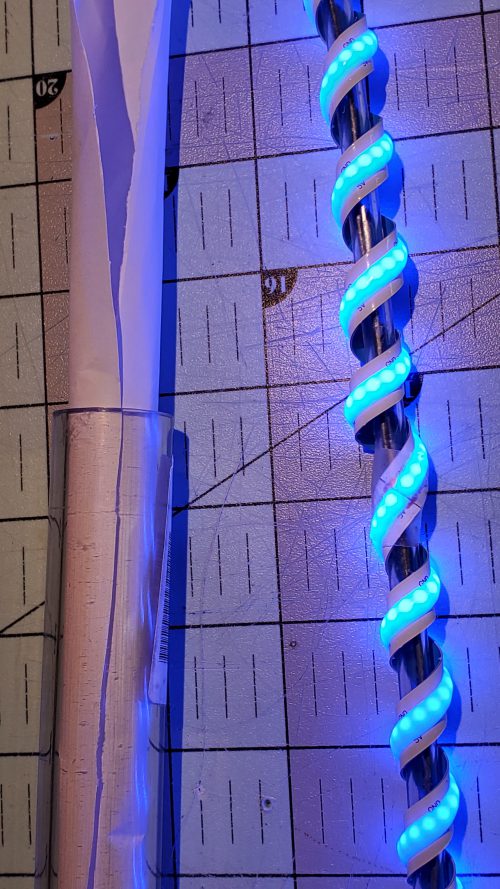
- First, let’s work on the understructure of the blade. Cut out a 36″ length of tubing and wire.
- Straighten the metal wire as best you can.
- Once it’s straight, put it into the tubing.
- Next, incorporate your leds in there! I tried wrapping the LEDs on the pole, but I ended up putting the LED strip parallel to the wire itself, and looping on the other side.
- Take the butcher paper/plastic bag material, and cut a rectangle of 26″ by ~5″. This will act as our diffuser, makng our LEDs appear like lit-up lines and more like a lit-up cilinder.
- Tighlty wrap up the paper to the wire.
- Fit the paper-wire combination into the PVC pipe.
- Connect the LED strip to your microcontroller and congratulate yourself on making an awesome lightsaber blade!
Putting it all together
You’re so close! You just haveto add everything together, including the wiring for all the components. There may be some gentle carving needed, but just like all the carving steps, slow incremental changes are best. Give yourself the time and space to finish this project strong.
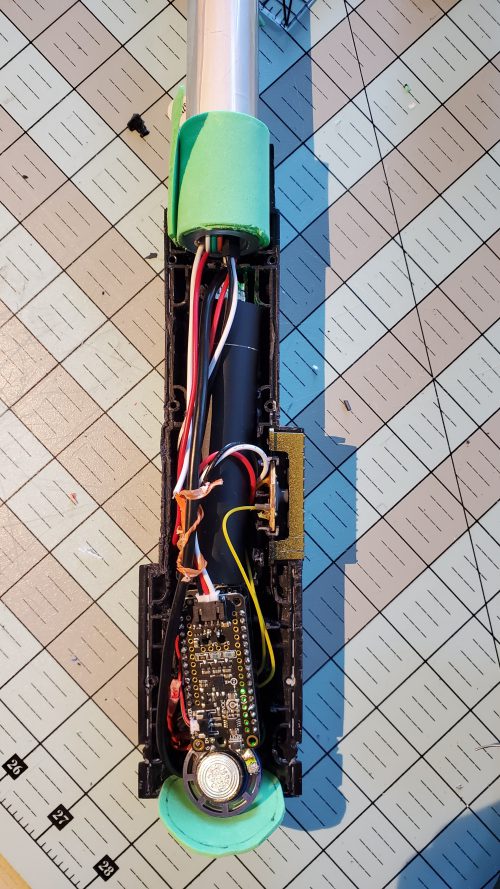
- First, try fitting the battery, microcontroller and usb cable connecting them together. First try to fit it into the hit, close it, and carve out any plastic that is in the way. Check to see if everything turns on. Repeat until you can close the hilt with no problem.
- This may depend on the kind of USB cable you have, but I found mine couldn’t fit, especially the thick beginning plug of the cable. Just in case that is the same for you, it’s time to shorten the usb cable! Time to mod the USB cable so it fits into the hilt! I found that the usb cable sticks too deep for it to fit. I used a USB repair guide to remove the plastic casing on the end of the USB cable, and resolder the red and black line.
- Next, I used twisty ties to fit the button wires nicely in the hilt. Try adding the button and its wires into the hilt,
- Tidy up the speaker wires together with twisty ties and fit it into the hilt.
- Finally, tidy up the LED wire strip wires, and add it to the hilt. If it helps, I added the hard plastic parts to the beginning insides of the blade itself.
- As a final step, cut a circle of the foam, and tuck it in as an endpoint to the hilt.
Customize and Upgrade
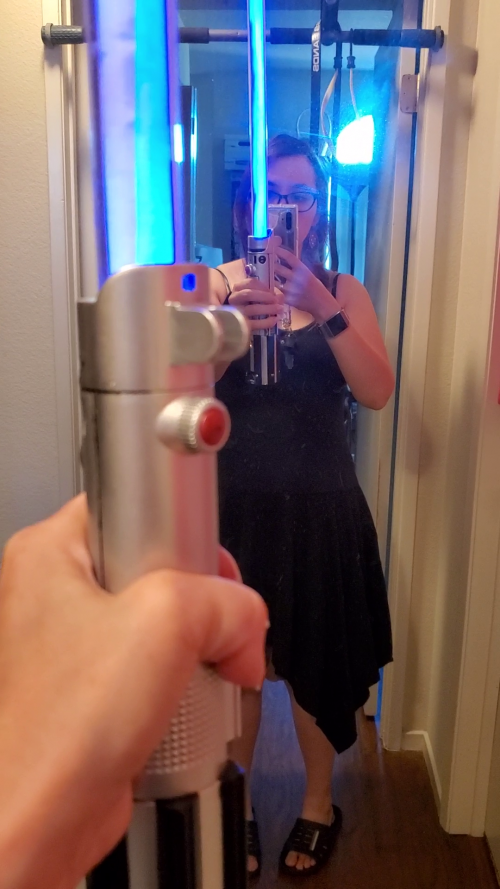
If all is well, you have your first prototype! Give it a swing, and a pat on the back! It’s no small feat to make it this far!
Let me stir your imagination on what to do next:
- You can add buttons for additional functionality!
- Use putty/filler to smooth out any gaps in the hilt, and color it! You can spray paint it, vinyl wrap it, paint it manually, do whatever you’d like to make it your own!
- Add a blade cap to your build. You can buy one, but you can always shape one from plastic, or even mold one with clear hot glue!
- Tweak the code to change the color, animation, interactions and music custom to your liking.
- Upgrade the sound to a bigger speaker! The bigger of speaker, the louder and more pronounced it all is! Unfortunately, I accidentally broke the volume knob of the propmaker, and it’s stuck on low! But once that gets replaced, a bigger speaker will be great for convention settings.
- Make it easy to charge! Provide an outlet you can connect to so it auto-charges.
Future Work
This build is one step towards my goal of making a wonderful con-going experience for photographers and other cosplayers. I want to build a lightsaber so bright that regardless of where I am, it’ll be an amazing photo. I also want any congoer to get great shots playing with my lightsaber.
I’m going to add as many LEDS as I can for a convention-safe lightsaber, so my photographer friends get a great shot indoors or outdoors. The last big upgrade is trying to make it fully interactive, that it can react to where the blade is being hit!
I am super curious in building a lightsaber even less expensively, out of a metal pipe! I do need a hilt lightsaber prop to hand to Luke cosplayers, after all! Check out the guide I’ll be using in the resources down below!
This lightsaber is a prop to go along with my Rey cosplay, and I’m planning to build a Kylo Ren cosplay too!
If you’re interested in seeing my upgrades (and my Rey and Kylo cosplays and fashion designs) check out my page and social media, and build along with me!
Finally, if there’s a way I can help out your organization with collaborations or career opportunities, I’d be happy to help! Please feel free to email me and let’s chat!
Resources
Much of what I do is stand on the shoulders of giants (intellectually and metaphorically haha), and contributing on top of great work that has been done before mine. Here’s some of that great work that you should check out. There are so many ways to build your own lightsaber. I think these are incredibly instructional and helpful for anyone of any skill level, and I think you should check this out alongside this guide!
- DIY lightsaber starting with a metal pipe! https://www.youtube.com/watch?v=3tdaqYUo78w
- DIY Rey’s Lightsaber $300 replica build for under $40 A great guide on another toy lightsaber build. Varies on materials and electronics, but still a wonderful guide.
- Adafruit’s overview on their lightsaber build, which includes a very cool 3D printed hilt.
- Punished Props and Sohy Wong’s collaboration on their 3D printed lightsaber! It is such a delight to see this collaboration, and they also used the Adafruit tutorial too.


